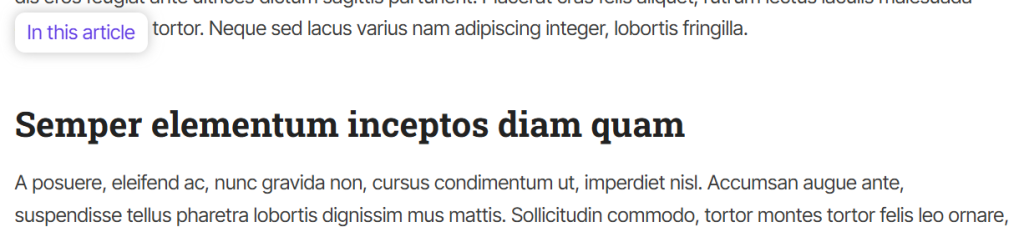
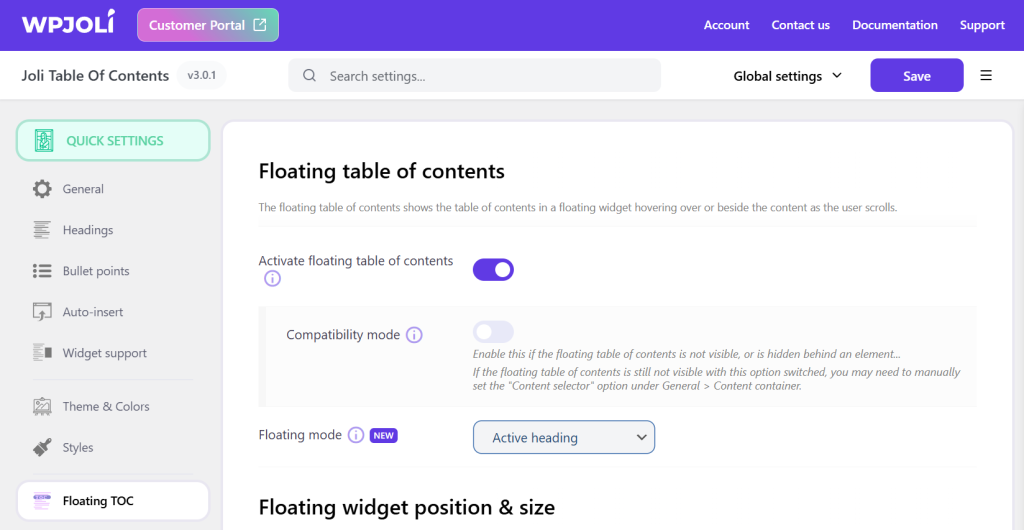
The floating table of contents is fixed widget that remains on top of your content. The reader can expand the TOC at any given moment and jump to the desired section.
Floating modes for the Floating Table of Contents
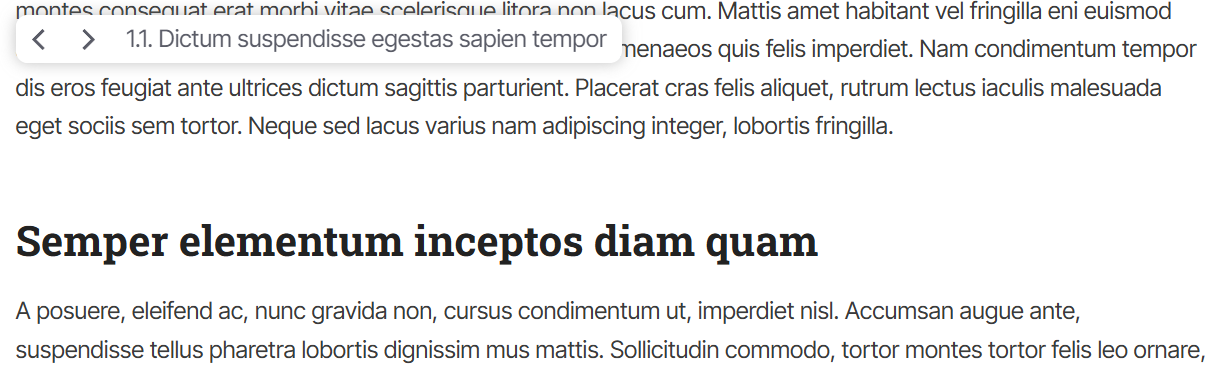
Originally, the floating TOC was only available with the “active heading” mode. This mode dynamically updates the current section the reader is viewing.
Since v3, there 3 additional modes for extra flexibility.
Active Heading
Show the active section with optional navigation buttons.
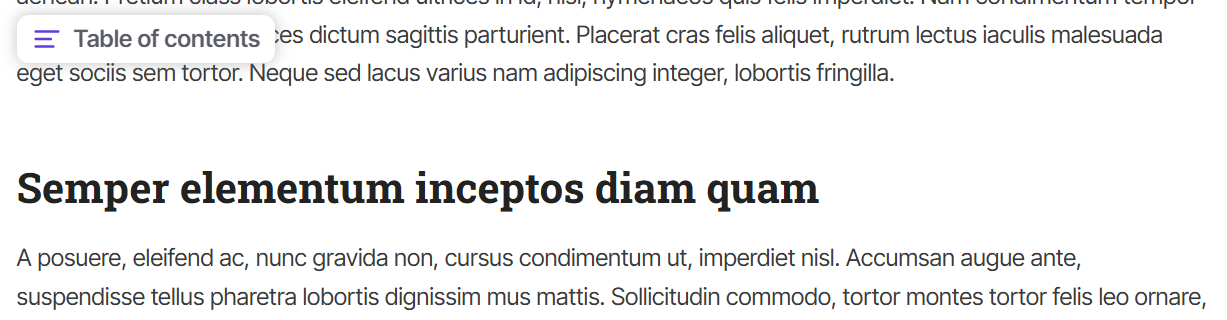
TOC Title
This mode uses the TOC title and icon (if it’s set) and remains static.
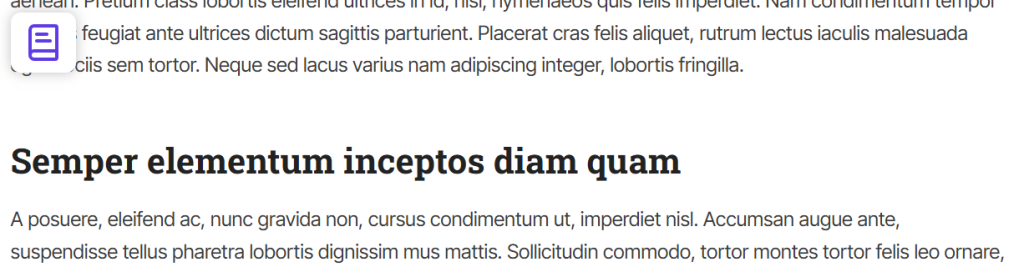
Custom Icon
This mode is the most minimalistic mode showing only an icon of your choice.
Custom Text
This mode shows a custom text.
How to add a Floating Table of Contents
Prerequisite: an inline table of contents must be in the content for the floating TOC to work.
After ensuring you have an inline table of contents, switch on Activate floating table of contents (under Floating TOC > Floating table of contents), select the desired Floating mode and adjust the settings to your liking.
I only want to show the Floating TOC on my page, how to do ?
If you don’t want an inline TOC while keeping the Floating TOC feature, you need to keep the inline TOC hidden.
To do so, go to General > Table of contents and switch on Hide main table of contents.
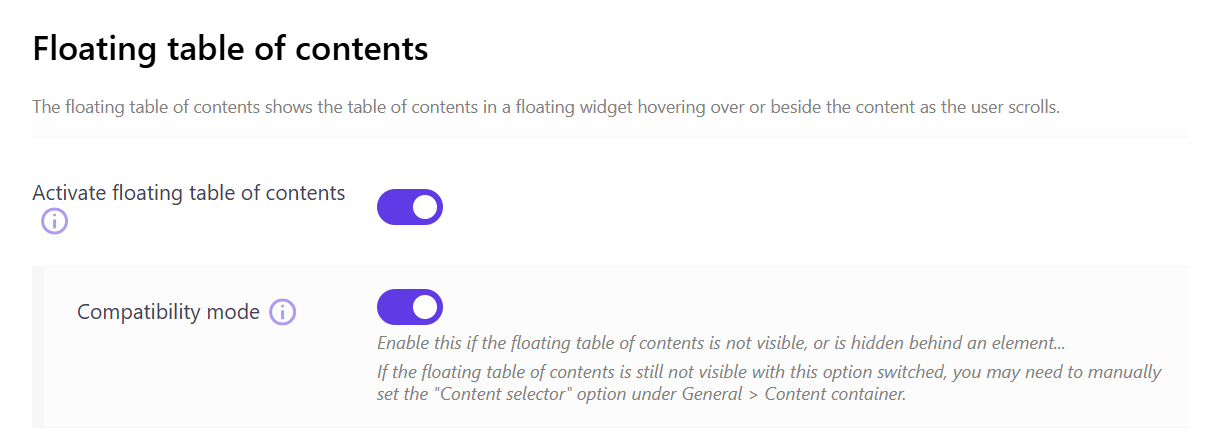
The floating widget is (partially) hidden, what to do ?
When using page builders such as Divi, Elementor, etc, it is likely that the table of contents gets nested in multiple DIV elements. This can lead to visual issues.
To get around this, activate the Compatibility mode and check if this solves the problem.
The floating widget is misaligned or is shown too early
By default, the floating widget is positioned relative to the inline TOC in the content.
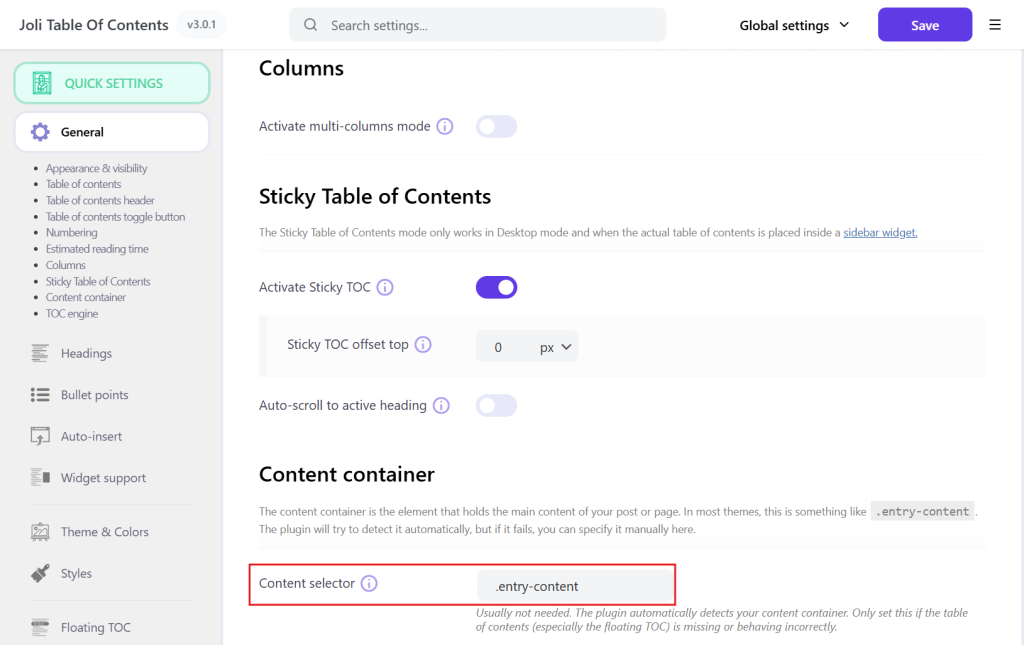
In the case the content container could not be detected automatically, you will have to set it manually to provide a context for the floating TOC.
To determine what your content container selector, browse to a page where the floating TOC is activated and around the top of the article (ideally on the inline table of contents), right click and press “Inspect” to bring up the element inspector.
As you hover elements, it will highlight the corresponding area in the browser.
The content container is normally the parent element of the table of contents (unless you placed your TOC in other elements like a “column”).
What we are looking for is the element that “wraps” the entire article (without the title).
In the screen capture below, when hovering the <div class="entry-content single-content">
Now the actual selector will be one of the class name preceded by a dot “.” and become .entry-content
The selector must be as specific as possible so that it cannot be mistaken for another element. It doesn’t have to be a single class name, but it can be any type of valid CSS selector. It can also be an id like #content-container.
Here are some valid selector for this example:
- .entry-content
- .entry-content-wrap .entry-content
- .entry-content.single-content
The selector must match the content container for every alike page.
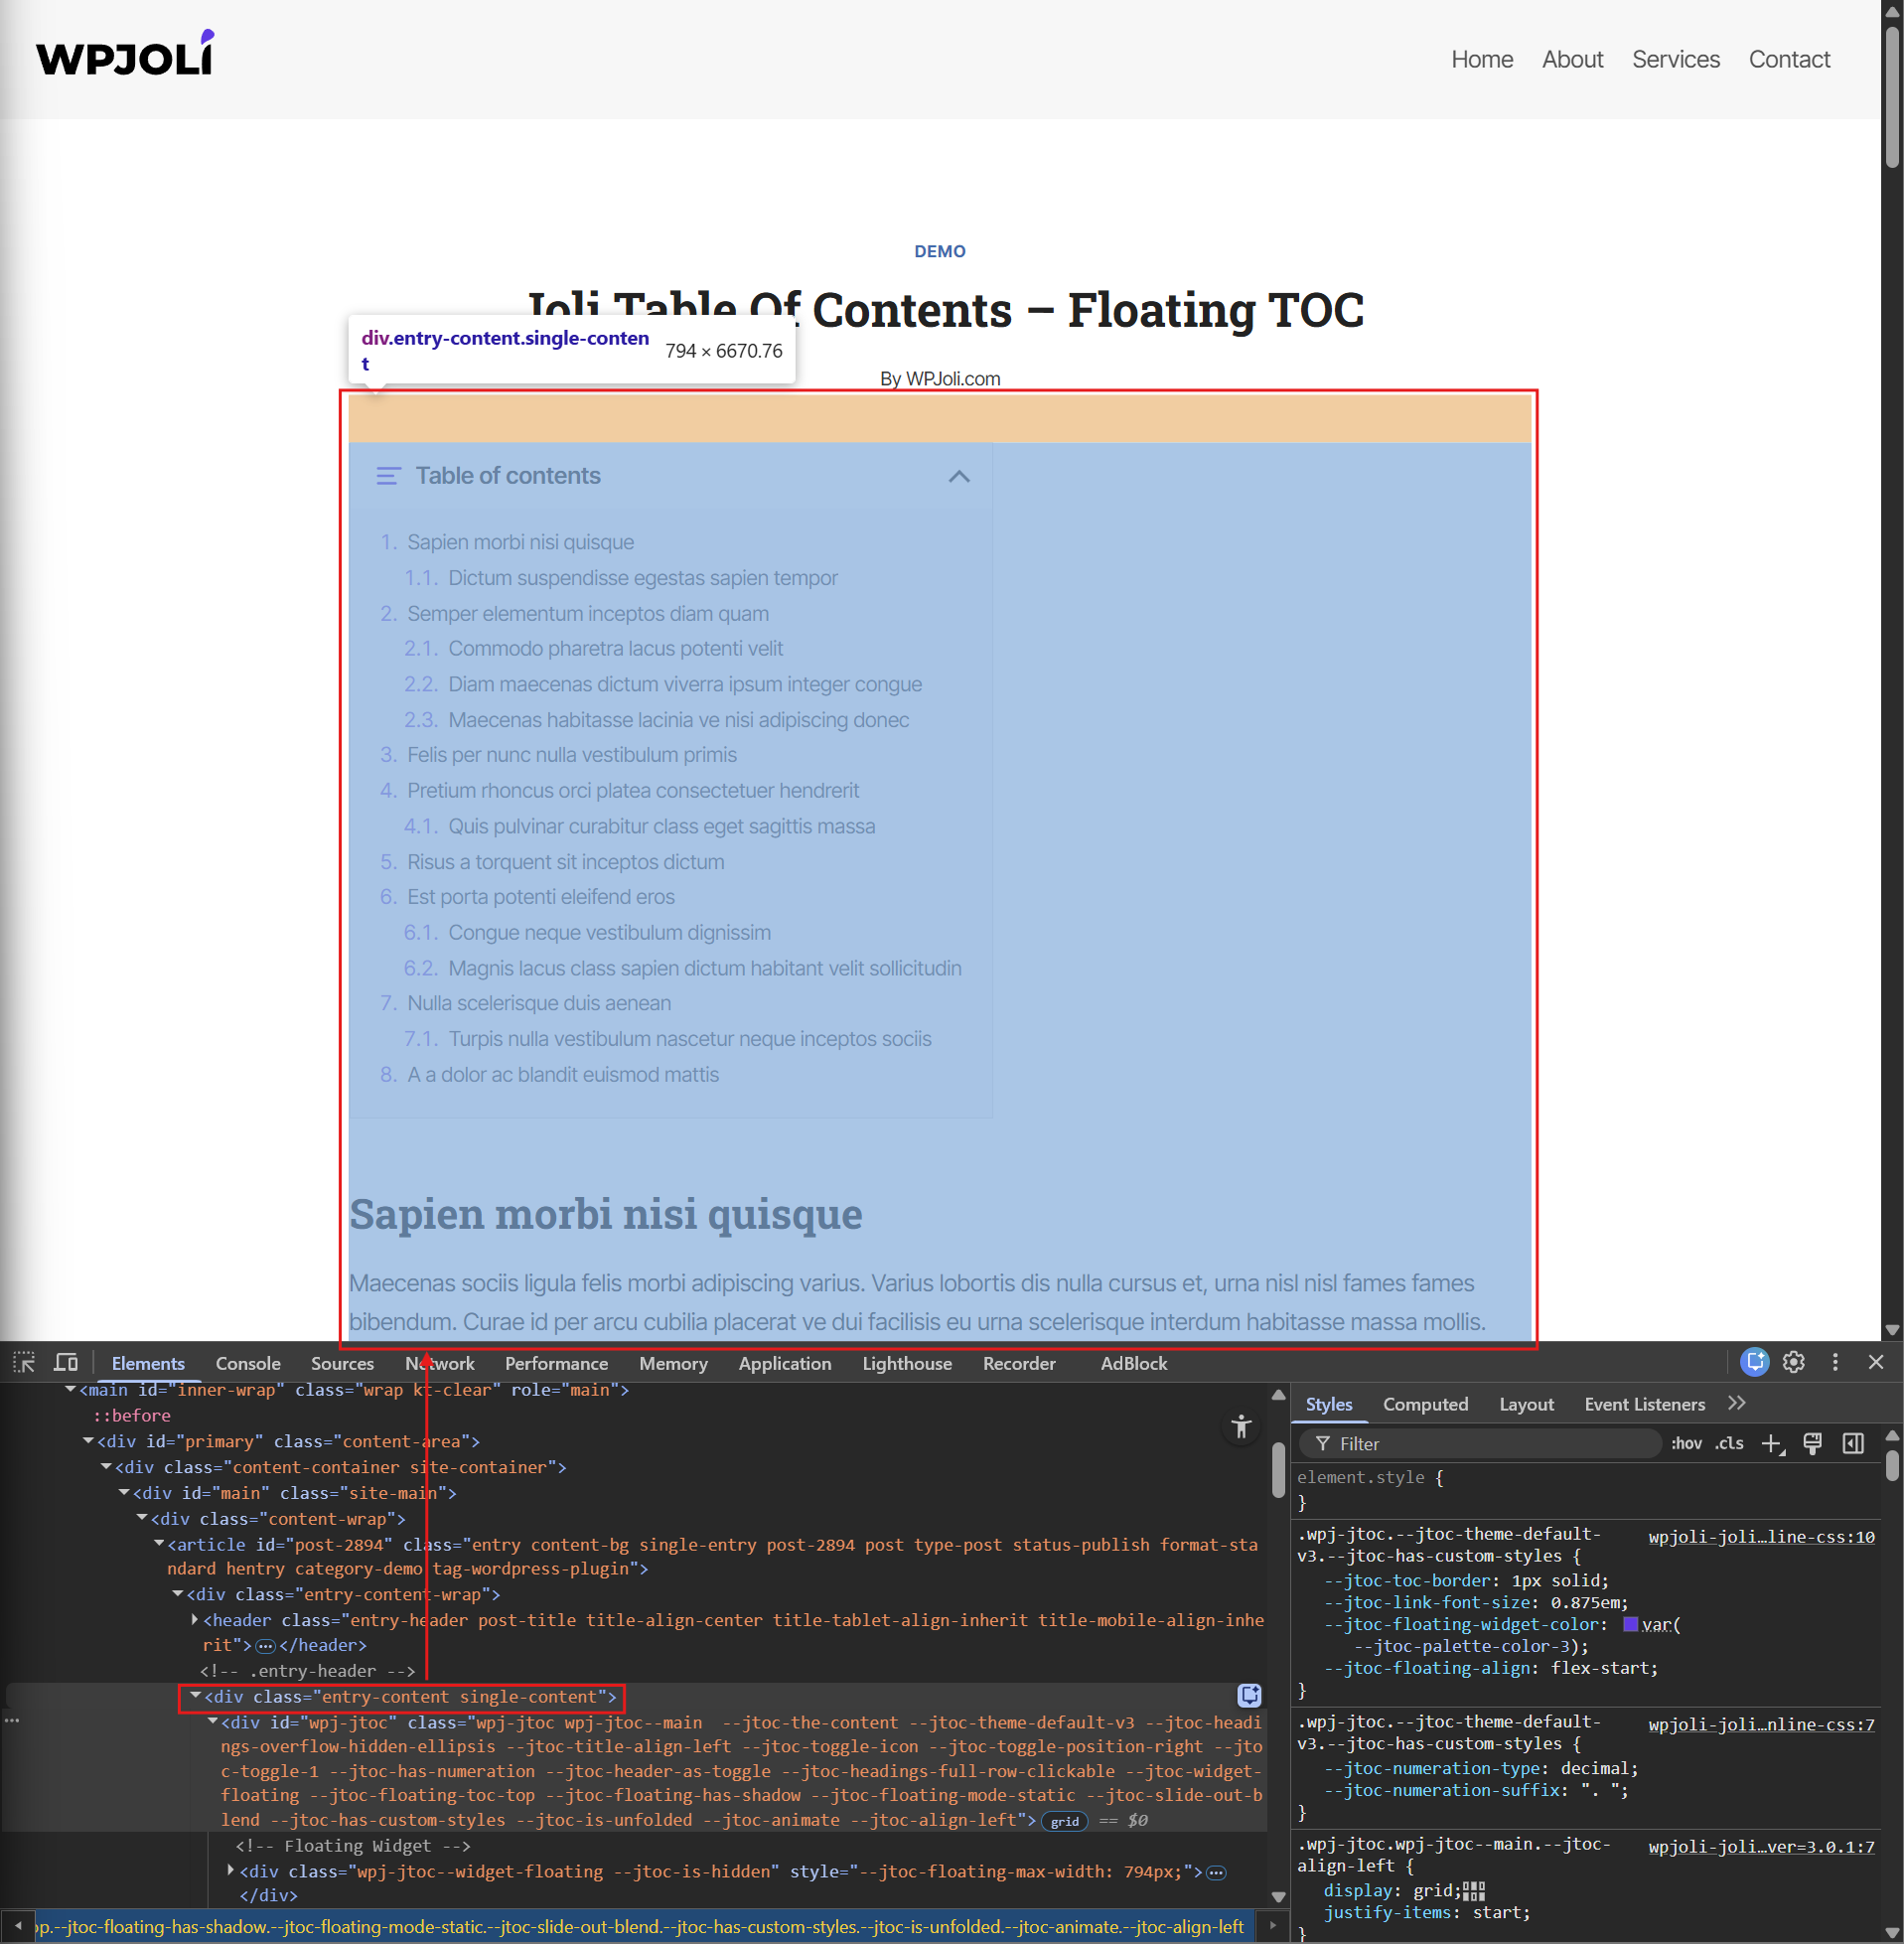
After you’ve determined the content container selector, enter it in Content selector (under General > Content container) and save the settings.